Import Building Data to Civil 3D
Any referenced datasets can be downloaded from "Module downloads" in the module overview.
In order to complete the exercise files in this module, you will need to download the data set by going to the Files menu above.
Importing a Revit building into Civil 3D ensures everything fits together on the site. In this unit, you’ll learn how to take advantage of work already done by the architect of the project, saving you time from recreating their work.
There are several methods to do this:
- Create shared coordinates: You have the ability to create a shared coordinate base point between Civil 3D and Revit. Creating a shared base point in Revit ensures that, when you bring information from Civil 3D into Revit or vice versa, it ends up in the correct location.
- Export 3D Solid (DWG) from Revit into Civil 3D: From your Revit project, you can export the building as a 3D Solid in DWG format.
- Export DWG from Revit into Civil 3D: Simply export the floorplan of choice from Revit and utilize the XREF options in Autodesk Civil 3D.
- Import Navisworks NWC/NWD into Civil 3D: Import a Navisworks NWC or NWD files directly into Civil 3D via XREF.
Autodesk Shared Reference Point:
- Found in the “Toolbox” under “Subscription Extension Manager”.
- From there you can export an XML file. That XML file will then be brought into Revit and line up the coordinates from Civil 3D.
Export a 3D Solid Model from Revit:
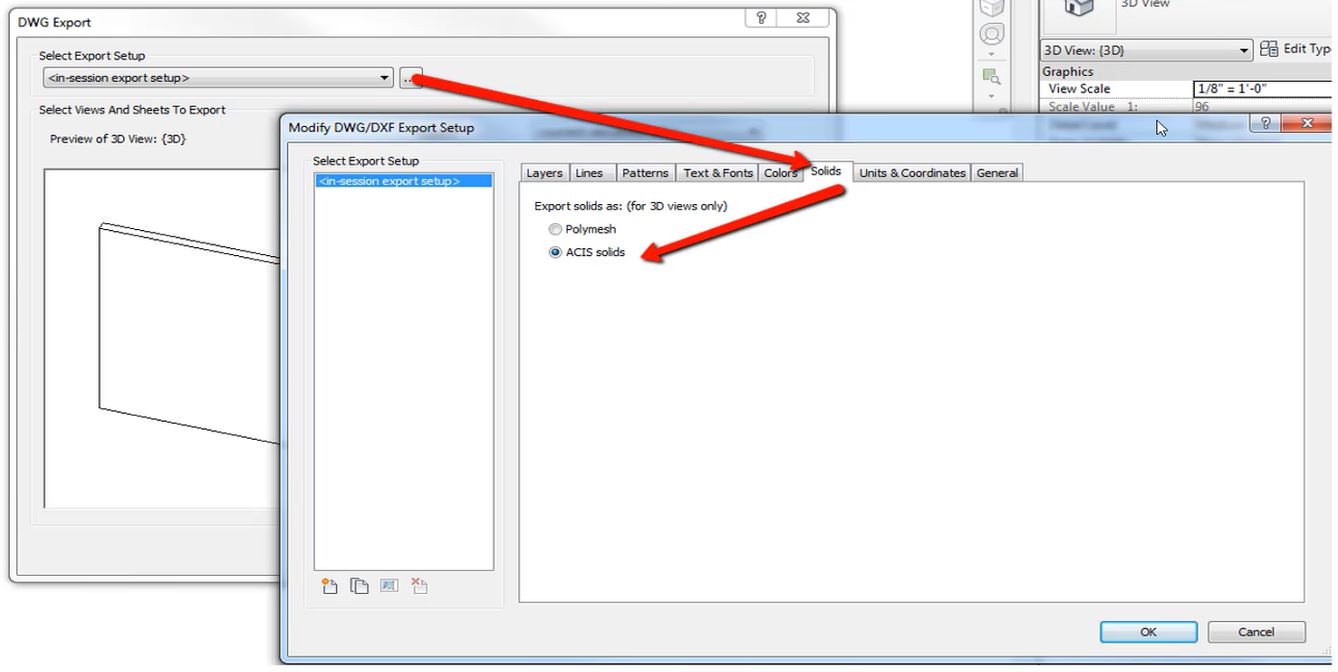
- In Revit, select “R” at the top left. Select “Export” and choose “CAD Formats” and then “DWG”.
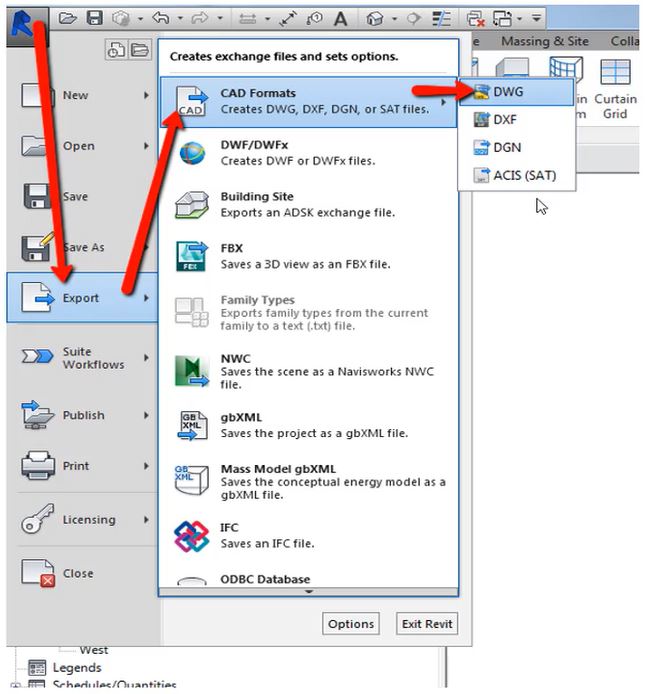
- In the “Manage Export” options, select “ACIS solids” from the “Solids” tab.
- Once you do that, you can export it out.
Export a DWG Floorplan from Revit:
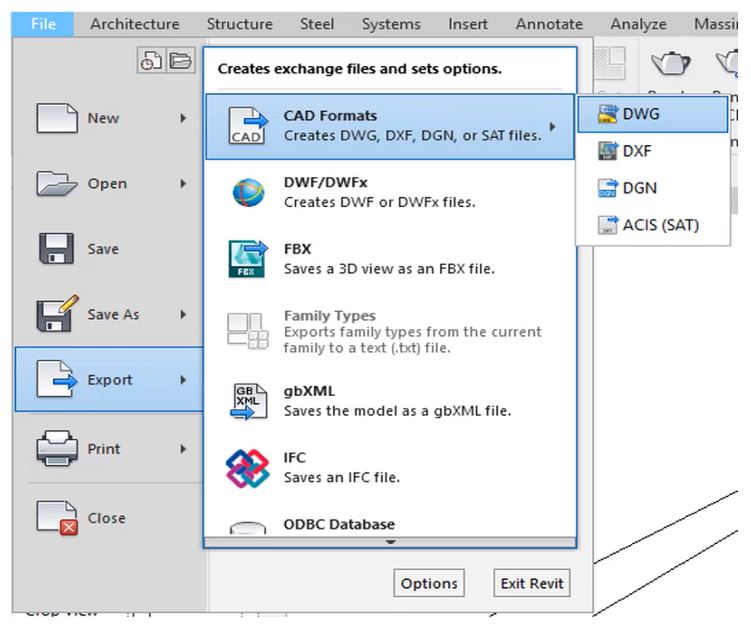
- In Revit, select “R” at the top left. Select “Export” and choose “CAD Formats” and then “DWG”.
- In the “Select Export Setup”, choose your view.
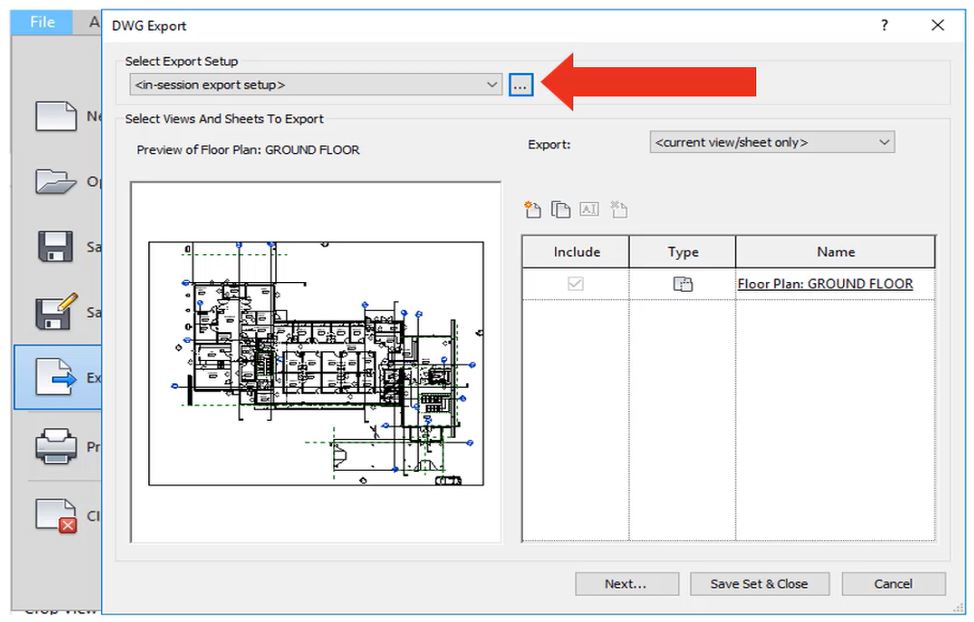
- From there, you can select layers, standards, linetypes and more.
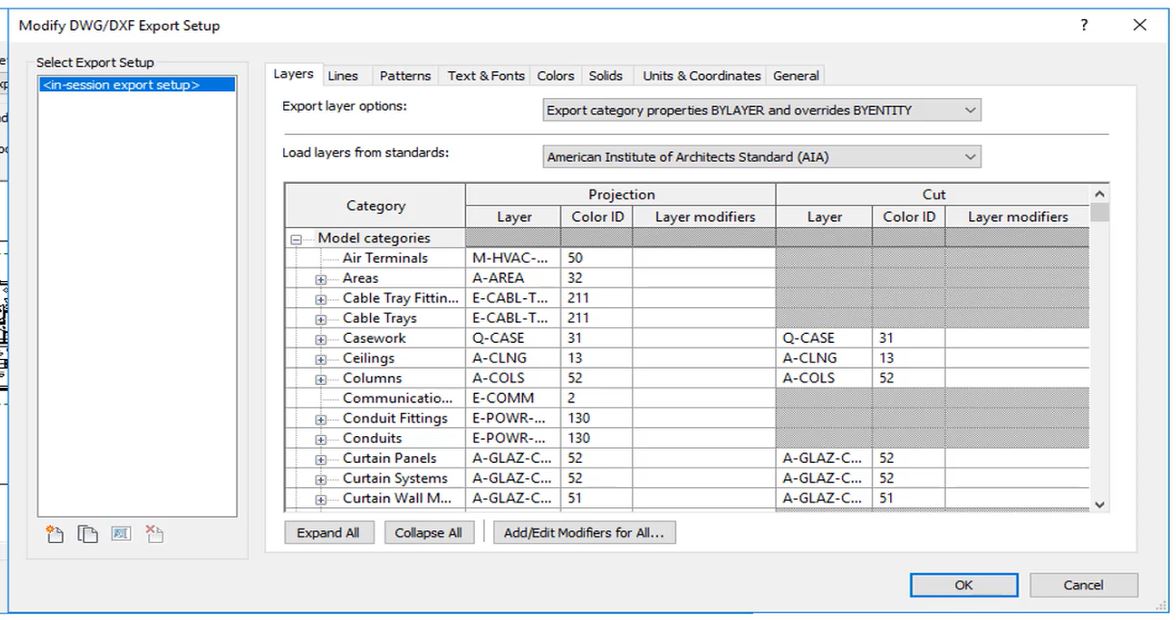
- This will export out a DWG that you can XREF into Civil 3D.

Now let’s take a look inside Civil 3D to see how we can bring these files in:
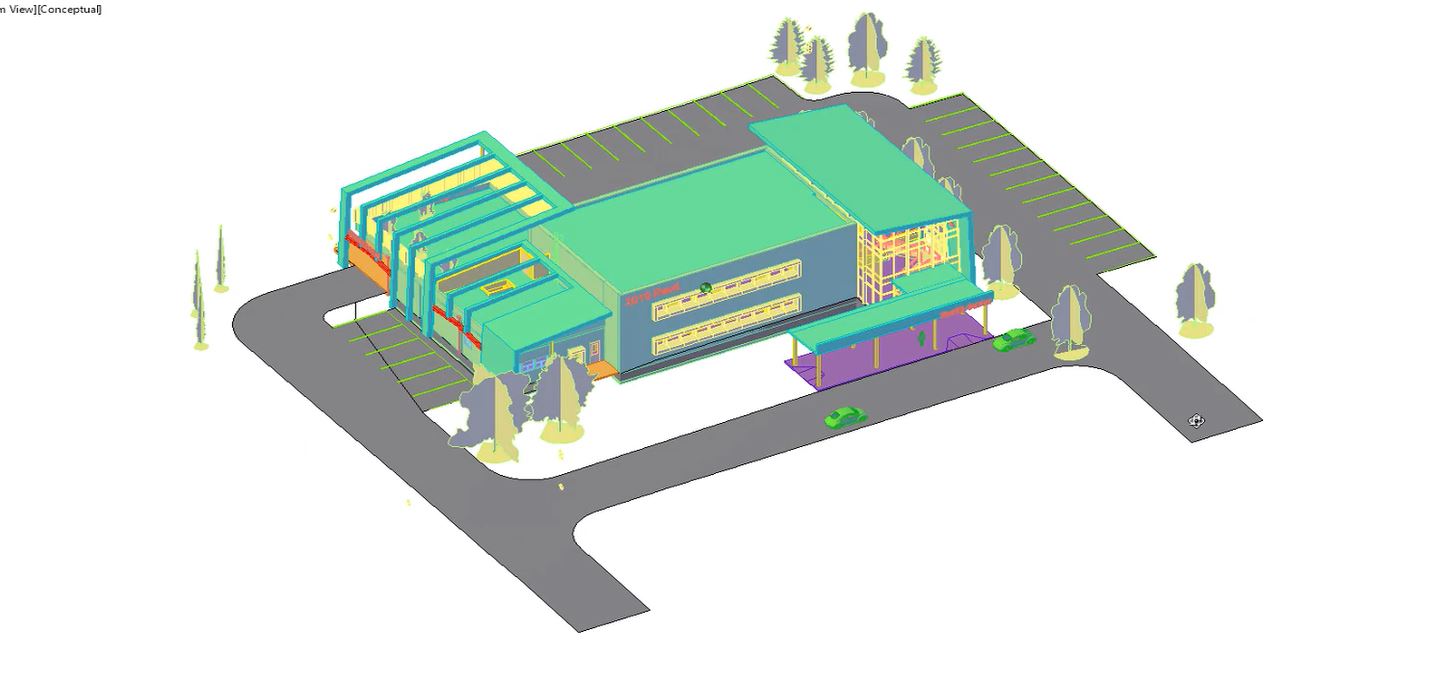
- First, we want to look at the formats brought in from Revit. Here we can see the 3D solid model exported from Revit with a lot of information.
- Now we can look at the 2D floorplan. This floorplan has a lot of information, but if you only want certain parts, ask your architect to only export those features. You can also export out the grid lines if they’re not already lined up in Civil 3D.

- To bring in the NWC file, select “Extremal References” from the right side of the screen, and then select “Attach Coordination Model…” from the “External Reference” manager.
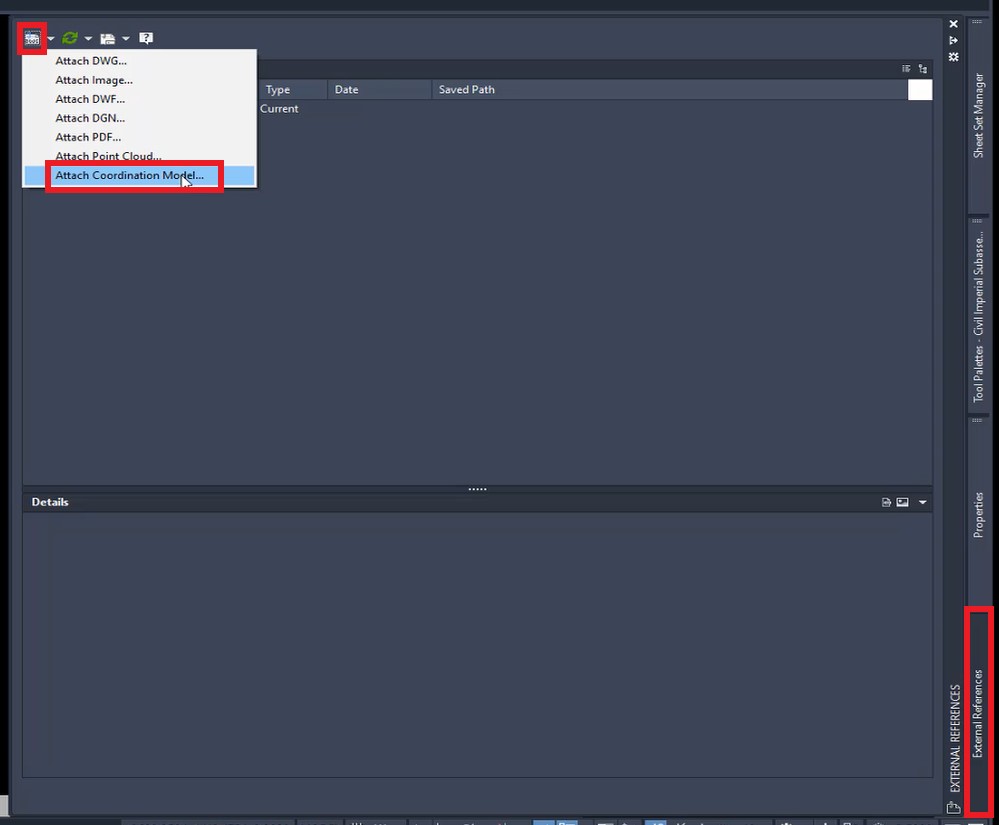
- From there, select he Navisworks file (NWC or NWD) and select “Open”.
- In the “Attach Coordination Model” window, uncheck the box for “Specify on-screen” and click “OK”.
- This will zoom into that coordinated model. Switch the view to “Isometric” and view the model.

- Let’s bring that into our site. First, let’s do the floorplan. In “External References” on the right side of the screen, select “Attach DWG…” from the “External Reference” manager.
- Select your exported floor plan and hit “Open”.
- If everything is scaled properly, and you’ve created the shared coordinate, then everything will line up. If this is the case, uncheck the boxes for “Specify on-screen” and select “OK”.
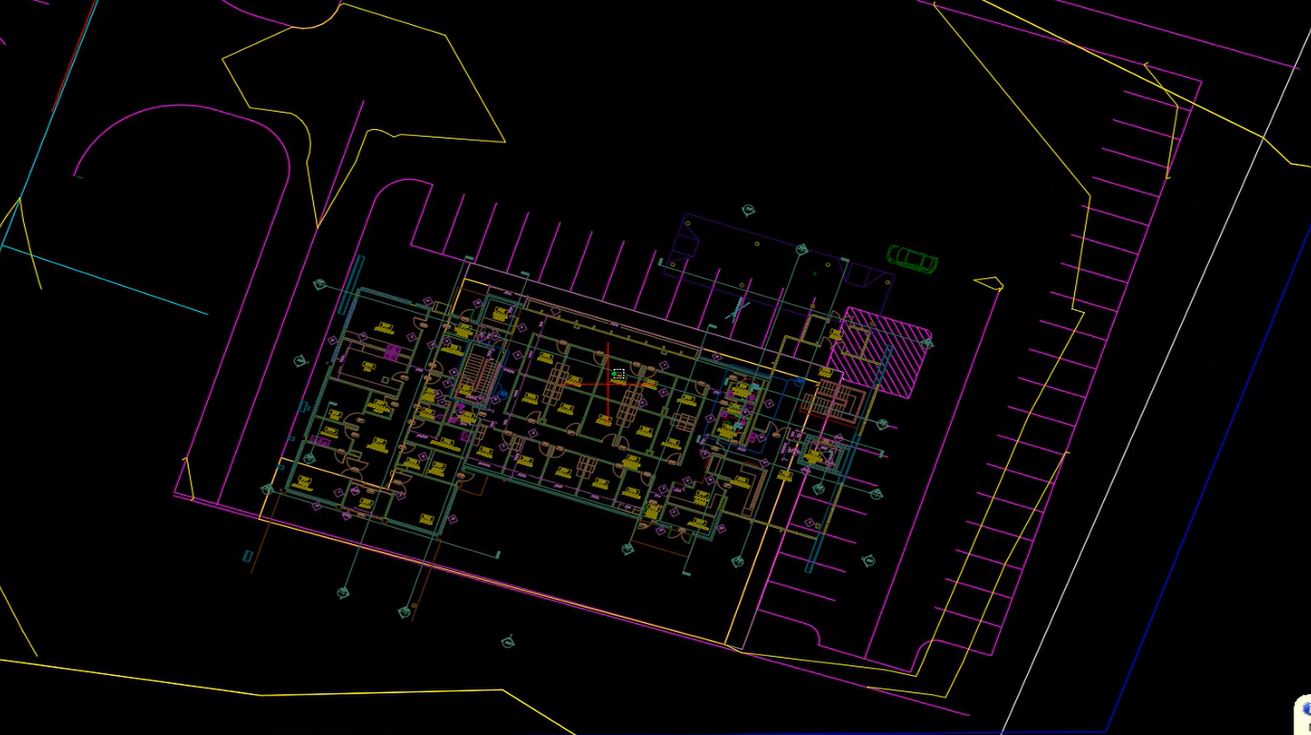
The XREF will now be in Civil 3D!
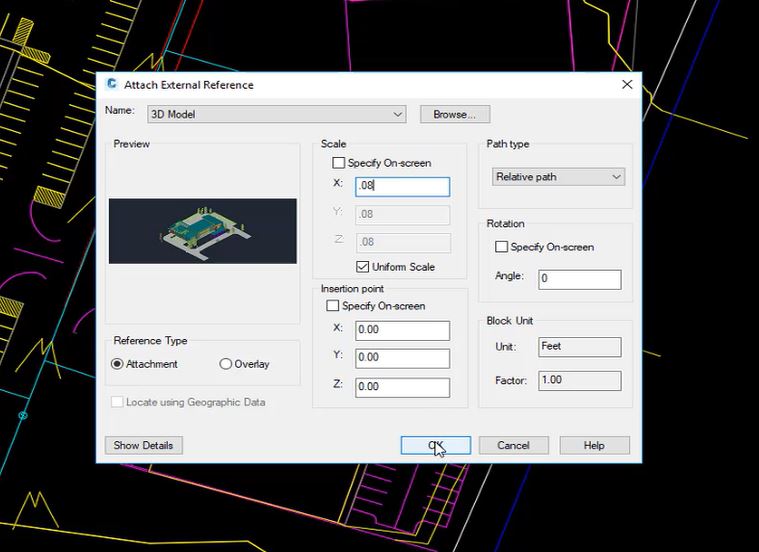
- Now let’s bring in the 3D model. In “External References” on the right side of the screen, select “Attach DWG…” from the “External Reference” manager.
- Select the 3D model DWG file and hit “Open”.
- Since these models tend to be scaled at a scale of 12, uncheck the boxes for “Specify on-screen” and key in “0.08” and select “OK”.
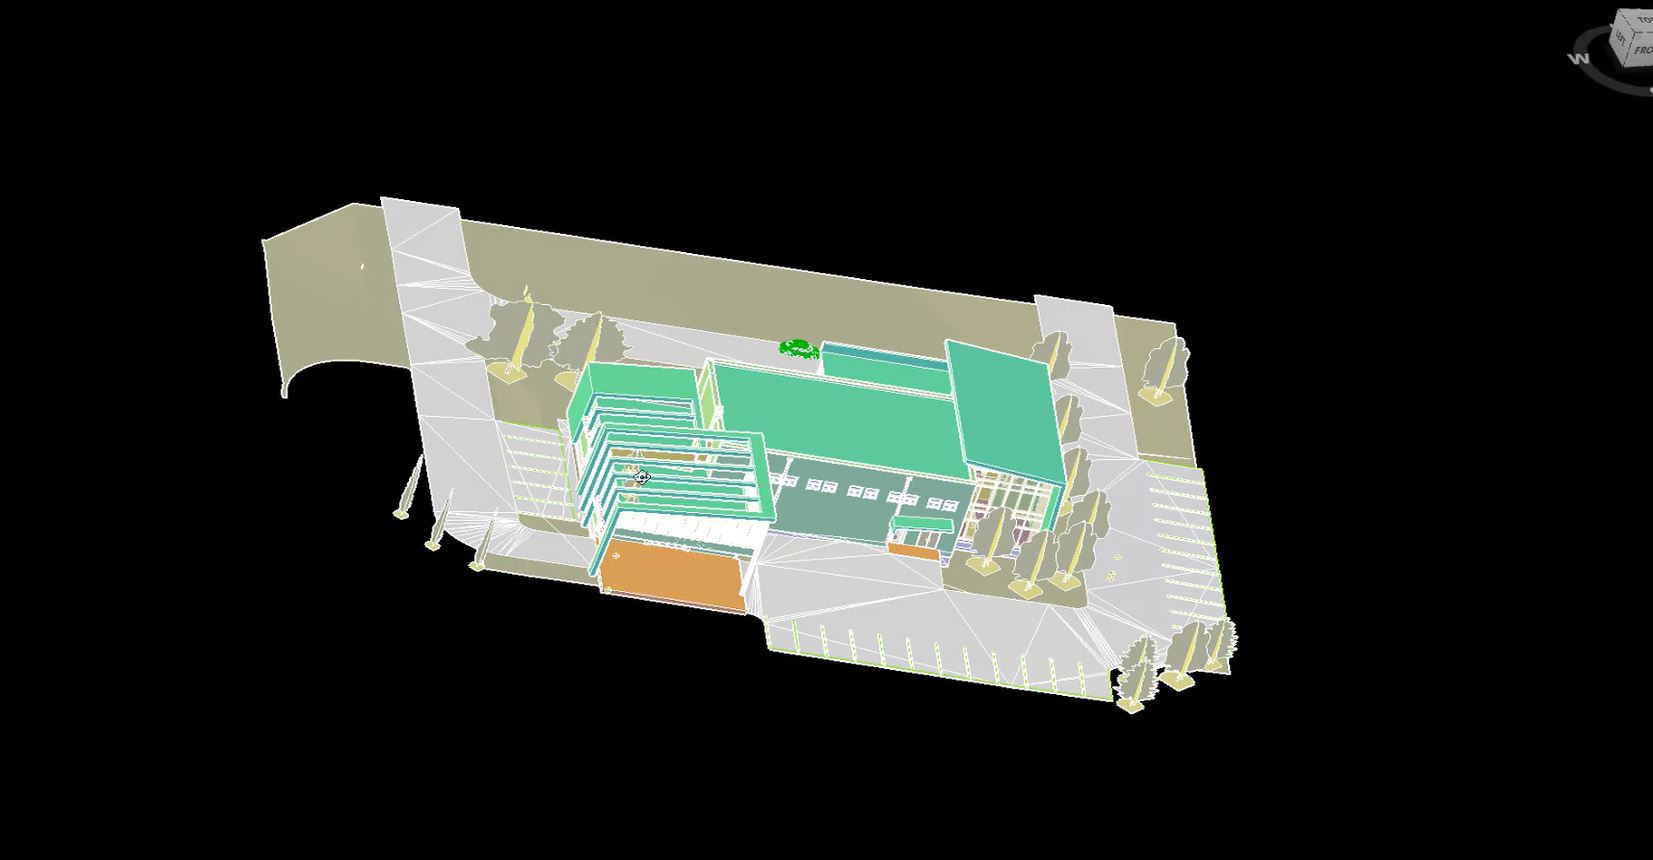
- Once that’s in, you can select the surface and choose “Object Viewer…” to see the surface better. In “Object Viewer”, change the view to “Isometric”.
There you have it! A quick way to save time by exporting and importing files from Revit into Civil 3D.