Importing GIS data
Import a GIS shapefile.
Tutorial resources
These downloadable resources will be used to complete this tutorial:
Step-by-step:
Location data can be imported into InfoDrainage from several different sources and in different orders. Geographic Information System, or GIS, data in the Shapefile (SHX) format is commonly imported into drainage models.
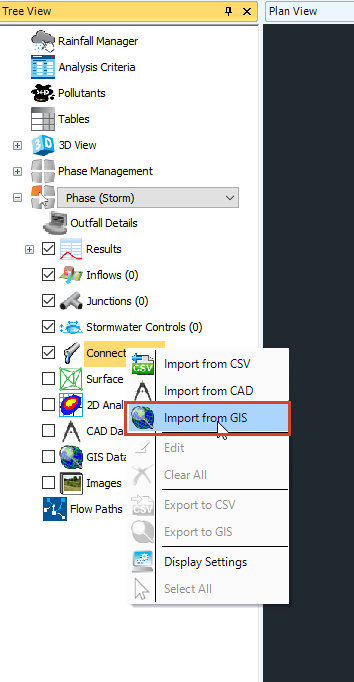
- From the Tree View, right-click the Connections node and select Import from GIS.
- In the GIS Import dialog box, set the source as Shapefile.
- Click Select.
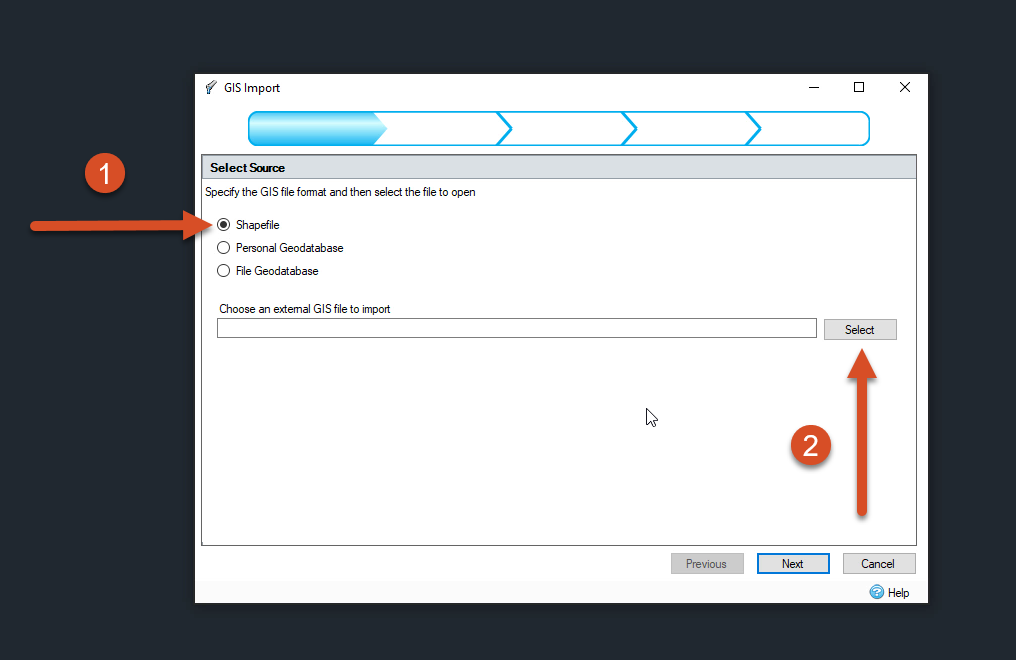
- In the data folder, select the file Pipes_only-line.shp.
- Click Open.
- In the GIS Import dialog box, with the file path now showing on the Select Source page, click Next.
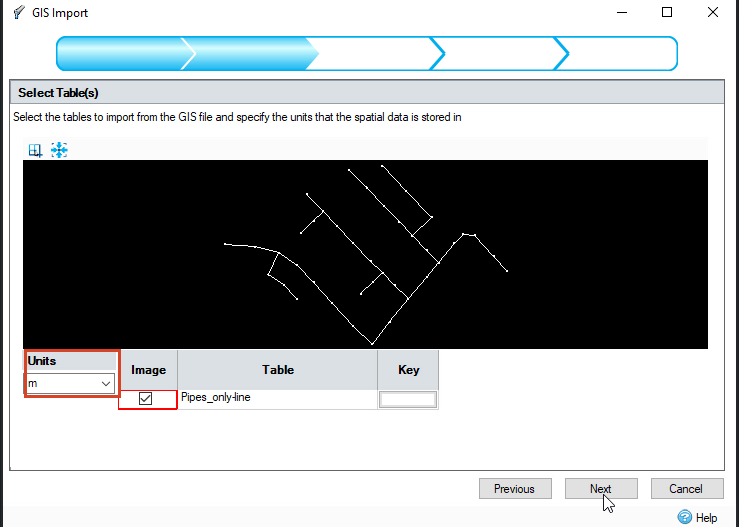
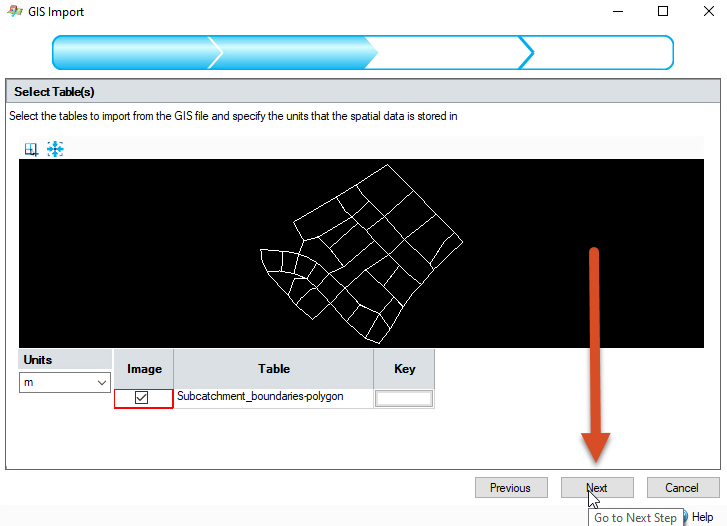
- On the Select Table(s) page, set the Units for the table to meters (m).
- Click Next.
- On the Select Template page, select
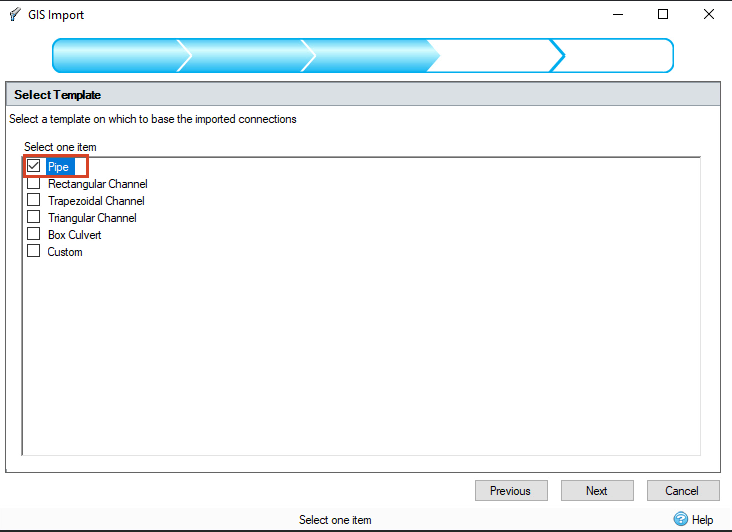
- Click Next.
- Another Select Template page appears. Check the box for Manhole.
- Click Next.
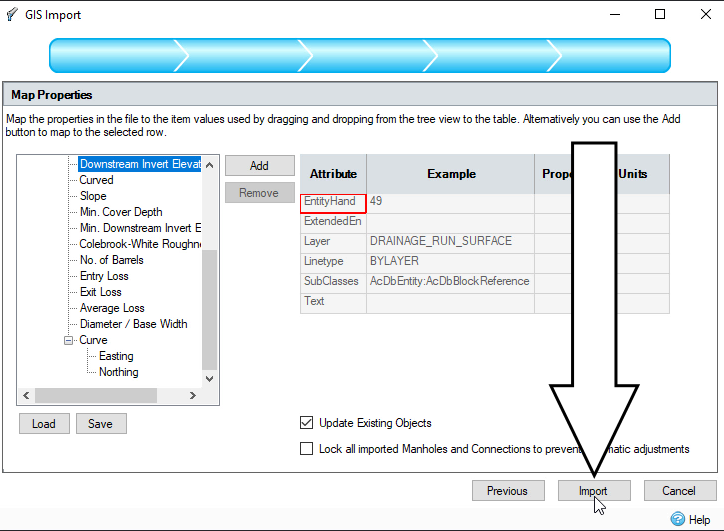
- On the Map Properties page, click Import.
- In the Import Summary dialog box, click OK.
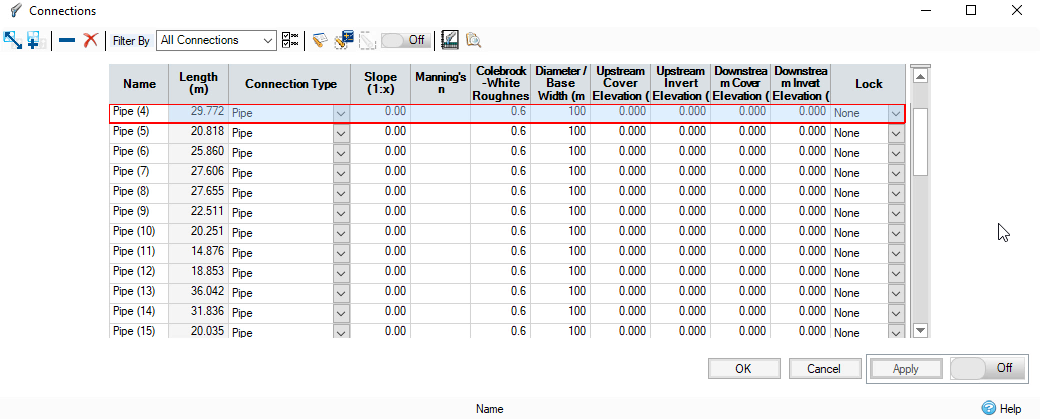
- In the Plan View, double-click one of the pipes to see a list of the connections and their details.
- After reviewing the details, close the Connections dialog box.
- To repeat the process to add inflows, in the Tree View, right-click Inflows.
- From the shortcut menu, select Import from GIS.
- From the Import from GIS dialog box, select Shapefile.
- Click Select.
- In the file browser, select the file Subcatchment_boundaries-polygon.shp.
- Click Open.
- In the Select Tables dialog box, click Next.
- In The Select Template page, select Catchment Area.
- Click Next.
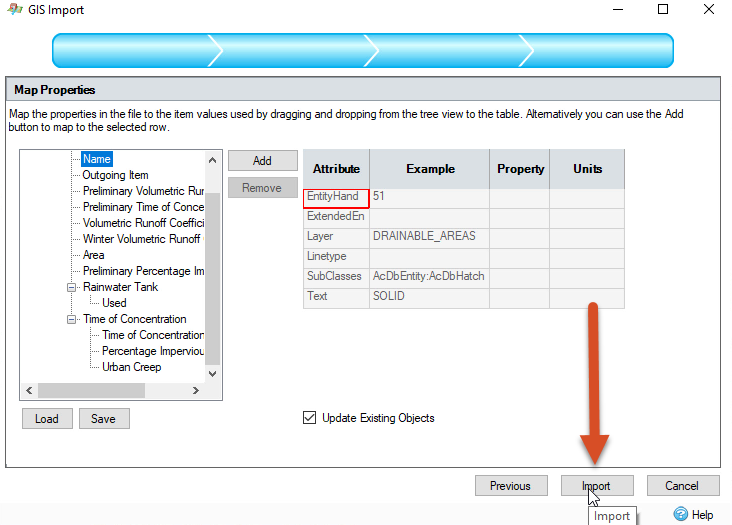
- In the Map Properties dialog box, click Import.
- Click OK in the Import Summary dialog box.
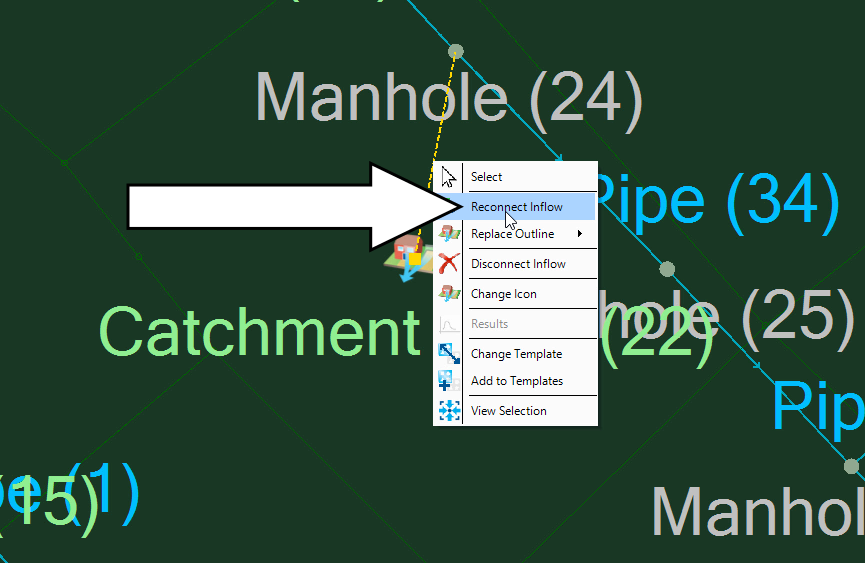
- Adjust an individual inflow connection by right-clicking on its icon and selecting Reconnect Inflow.
- From the Tree View, right-click Surface.
- Select Load Surface.
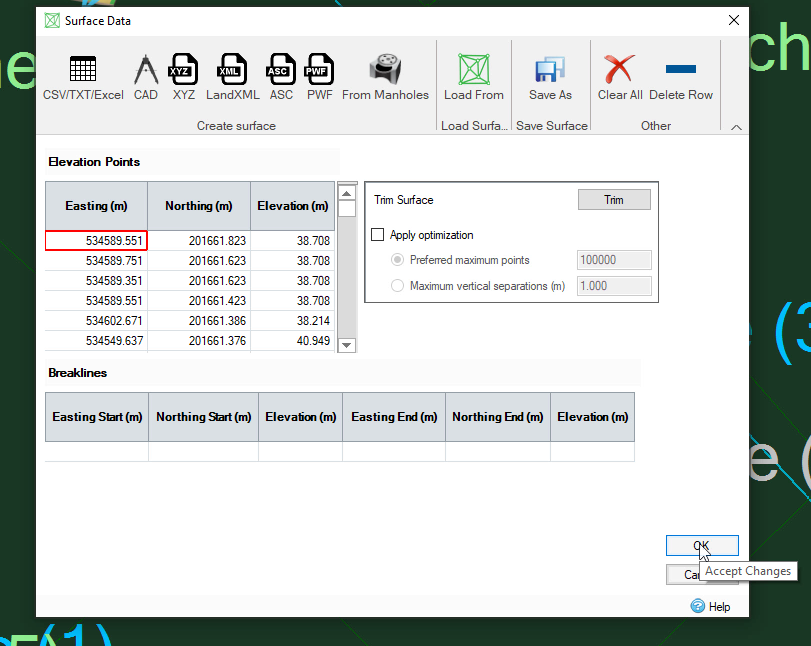
- In the Surface Data dialog box, Load Surface panel, click Load From.
- In the file browser, select the file imported surface.idsx.
- Click Open.
- In the Surface Data dialog box, click OK to complete the import process.
- In the notification, choose ‘Keep All – No elevations will be updated’.
- In the Plan View, double-click one of the manholes to see its details.
Note: importing different datasets does not need to happen in a certain order.