Exporting the model from Civil 3D to InfoDrainage
Export the model from Civil 3D to finish the drainage network in InfoDrainage.
Tutorial resources
These downloadable resources will be used to complete this tutorial:
Step-by-step
After the surface has been used to create the pipe network structure and catchment data in Civil 3D, the next task is to export the model to InfoDrainage using the InfoDrainage add-on, which comes with the Ultimate version of InfoDrainage.
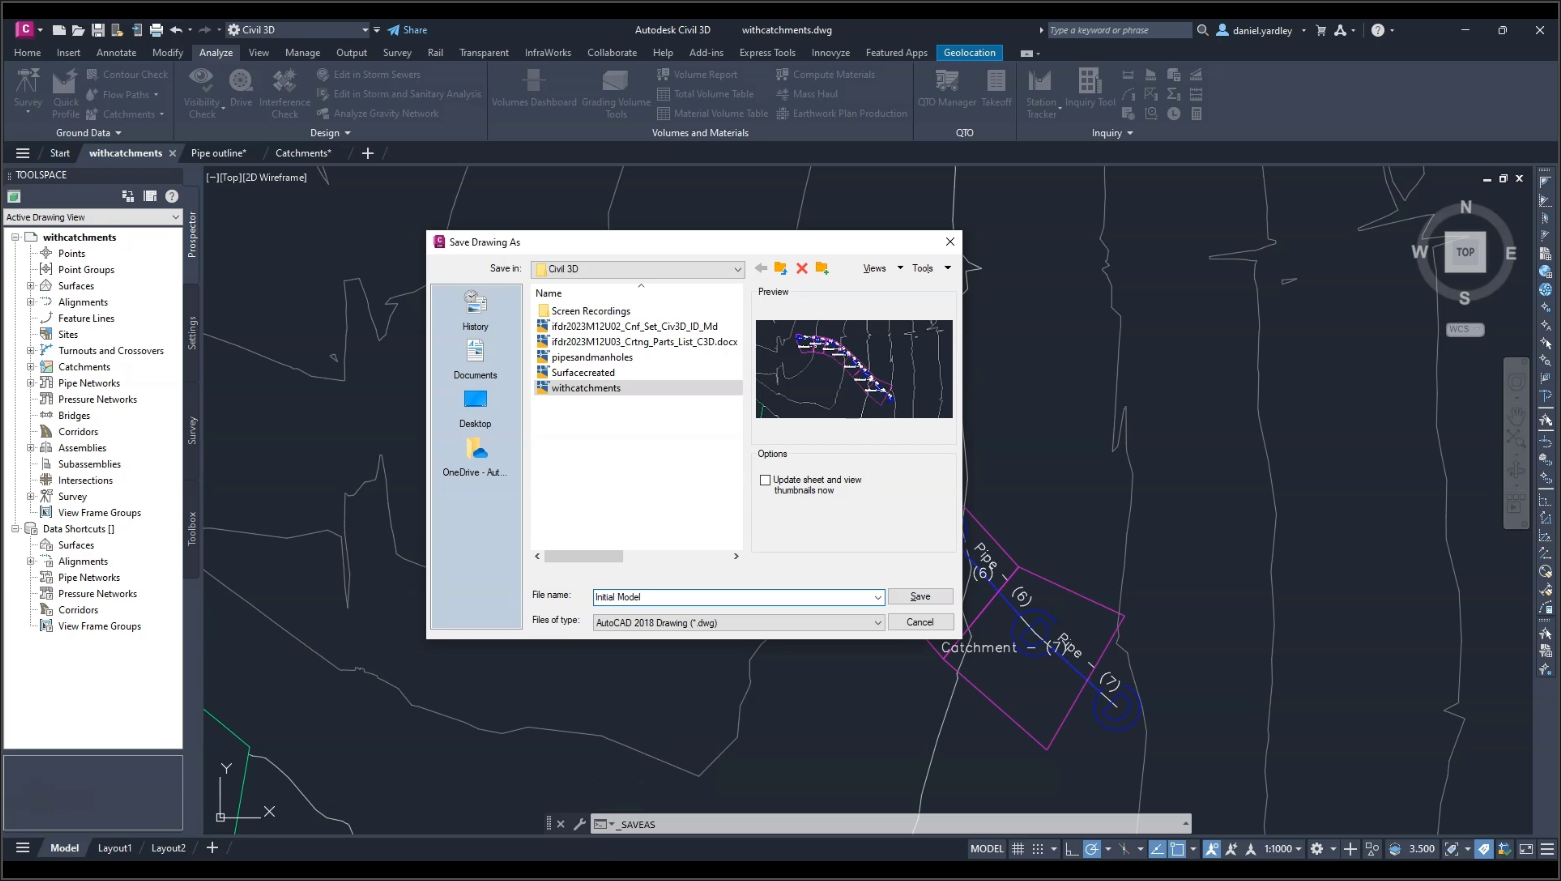
- In Civil 3D, click File > Save As to save the file.
- For this exercise, in the Save Drawing As dialog box, name it, “Initial Model”.
- Click Save.
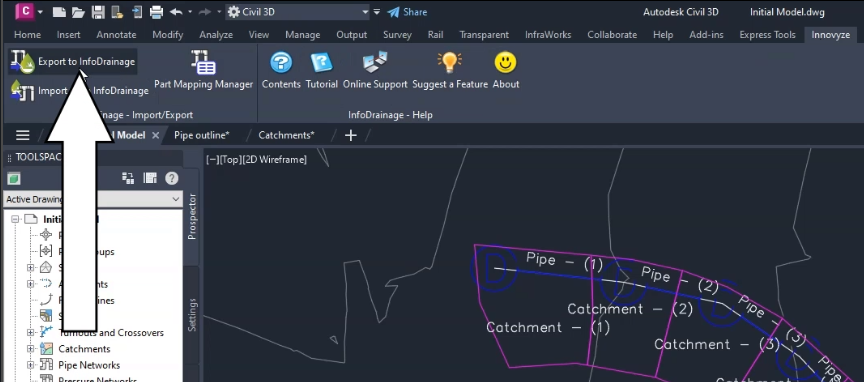
- On the ribbon, click the Innovyze tab.
- In the Import/Export panel, click Export to InfoDrainage.
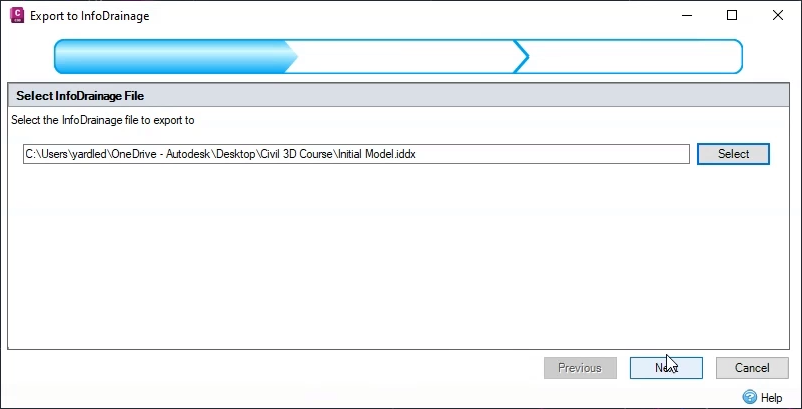
- In the Export to InfoDrainage wizard, click Select.
- In the Save As dialog box, browse to and select the folder where the exported InfoDrainage file is to be saved.
- Click Save.
- Back in the wizard, click Next.
- On the Select Networks and Surfaces page, select the network for export. For this example, select Storm1.
- Expand the drop-down and select Do not export a surface.
IMPORTANT: For this example, the surface data is already available in InfoDrainage. However, if you know that you need to include the surface, you could select it here or create one.
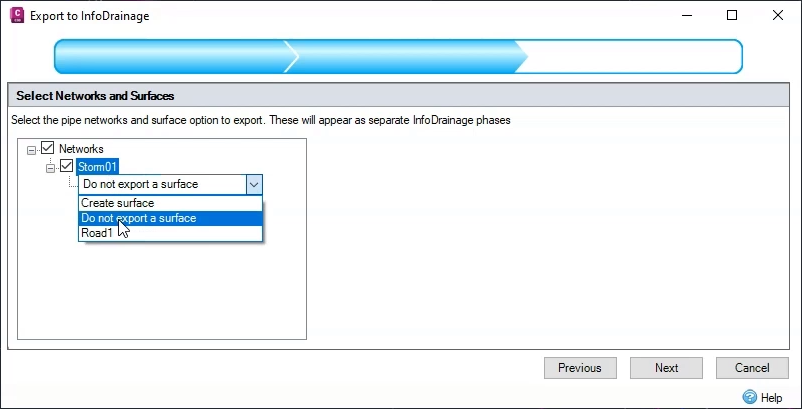
- Click Next.
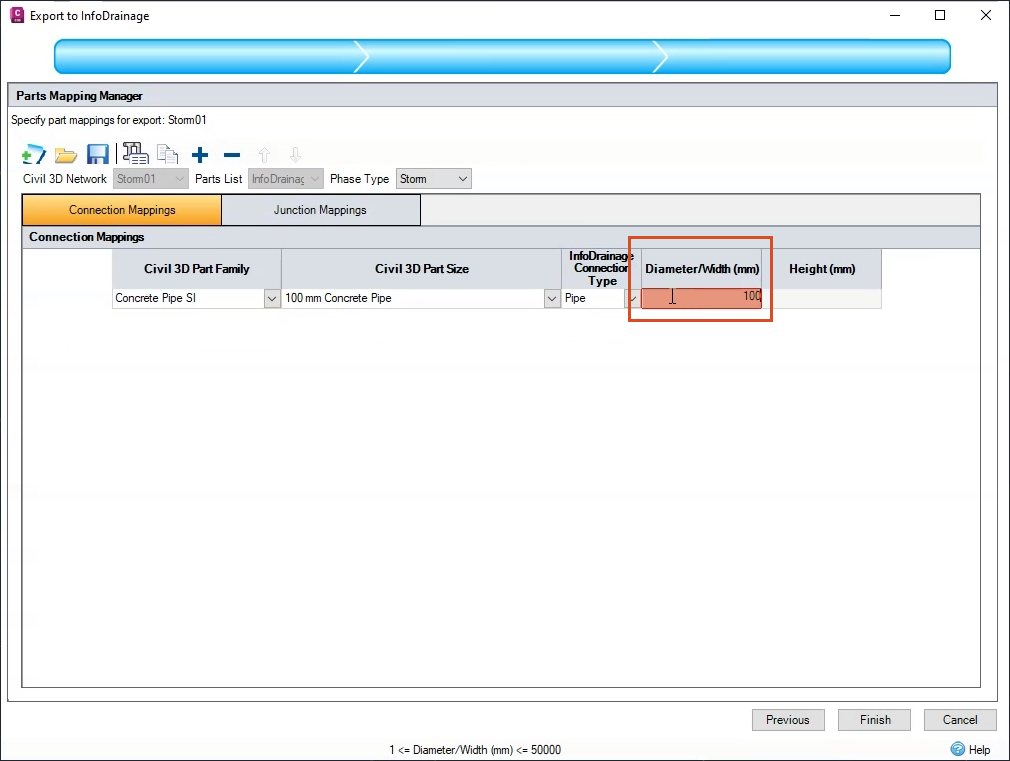
- In the Parts Mapping Manager, on the Connection Mappings tab, in the Diameter/Width (mm) field, enter 100.
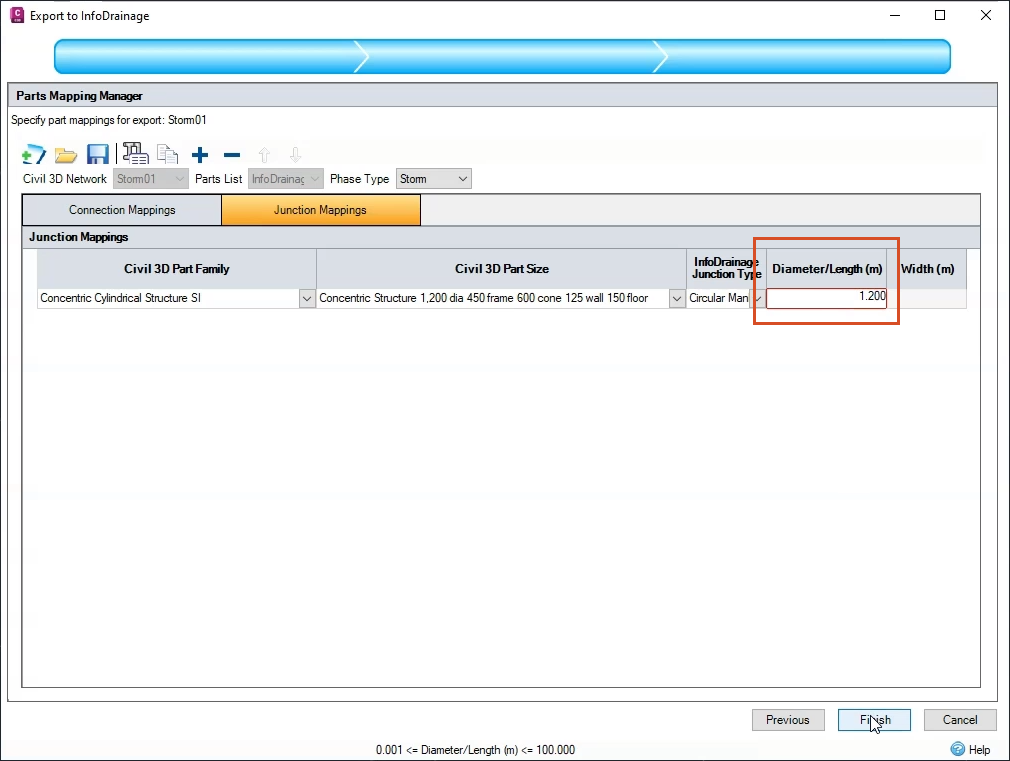
- Click the Junction Mappings tab.
- Enter a Diameter/Length (m) of 1.2.
- Click Finish.
IMPORTANT: The Connection Mappings and Junction Mappings properties will be changed to be more precise in InfoDrainage, so they do not need to be exact here.
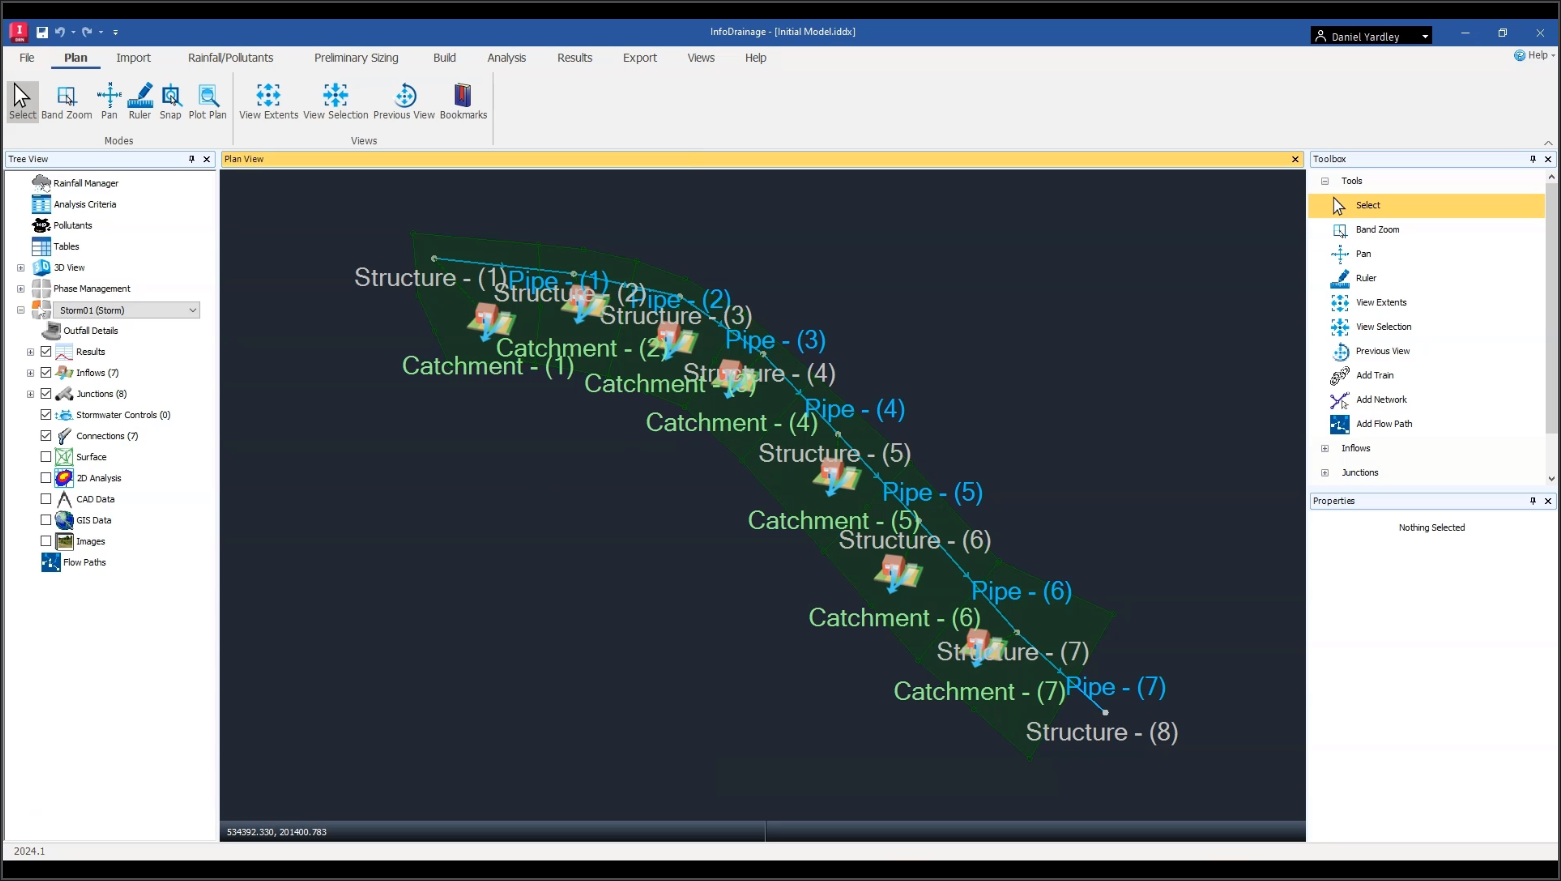
- Once the file has finished the export process, open the model in InfoDrainage.
Note: Best practice is to investigate any validation errors first, before you make any other changes to the model in InfoDrainage.