Docs part 3 | Perform a design review
Use tools in Autodesk Docs tools to compare 2D sheets, compare 3D model views, and communicate design and non-conformance issues.
Autodesk Online Help resources: About Autodesk Docs; Compare tool; markups; issues
Learning objectives:
- Review plans and models for accuracy through visual checking.
- Compare two versions of 2D sheets with the Compare tool.
- Compare two versions of 3D models with the Compare tool.
- Add markups and text to communicate design errors.
- Publish markups.
- Create an issue to communicate non-conformance issues to stakeholders.
- Resolve an issue between you and a colleague.
Open project file
- Account sign in: Sign in to the Autodesk Construction Cloud.
- Access folder: In Docs, open Files > Project Files > Class Project folder.
- Open file: Open file named: Revit 2025_Small Bldg_All disciplines.rvt. Make sure you are viewing Version 2.
Exercise questions
After opening the Revit file, provide answers to the questions below.
- Design review — Compare changes in sheets: In the model file, open Sheet A101—First Floor. Using the Compare tool, describe the changes between version 1 and version 2 of this sheet.
- How many objects were added?
Number of objects___________________ - What is the name of the furniture family against the outside wall along column grid 1?
Revit family name___________________ - How many windows have been added and removed?
Number of new windows_________ Number of windows removed_________ - Design review — Compare changes in a 3D model view: Open the Level 1 view. Using the Compare tool, describe the changes between version 1 and version 2 of the model.
-
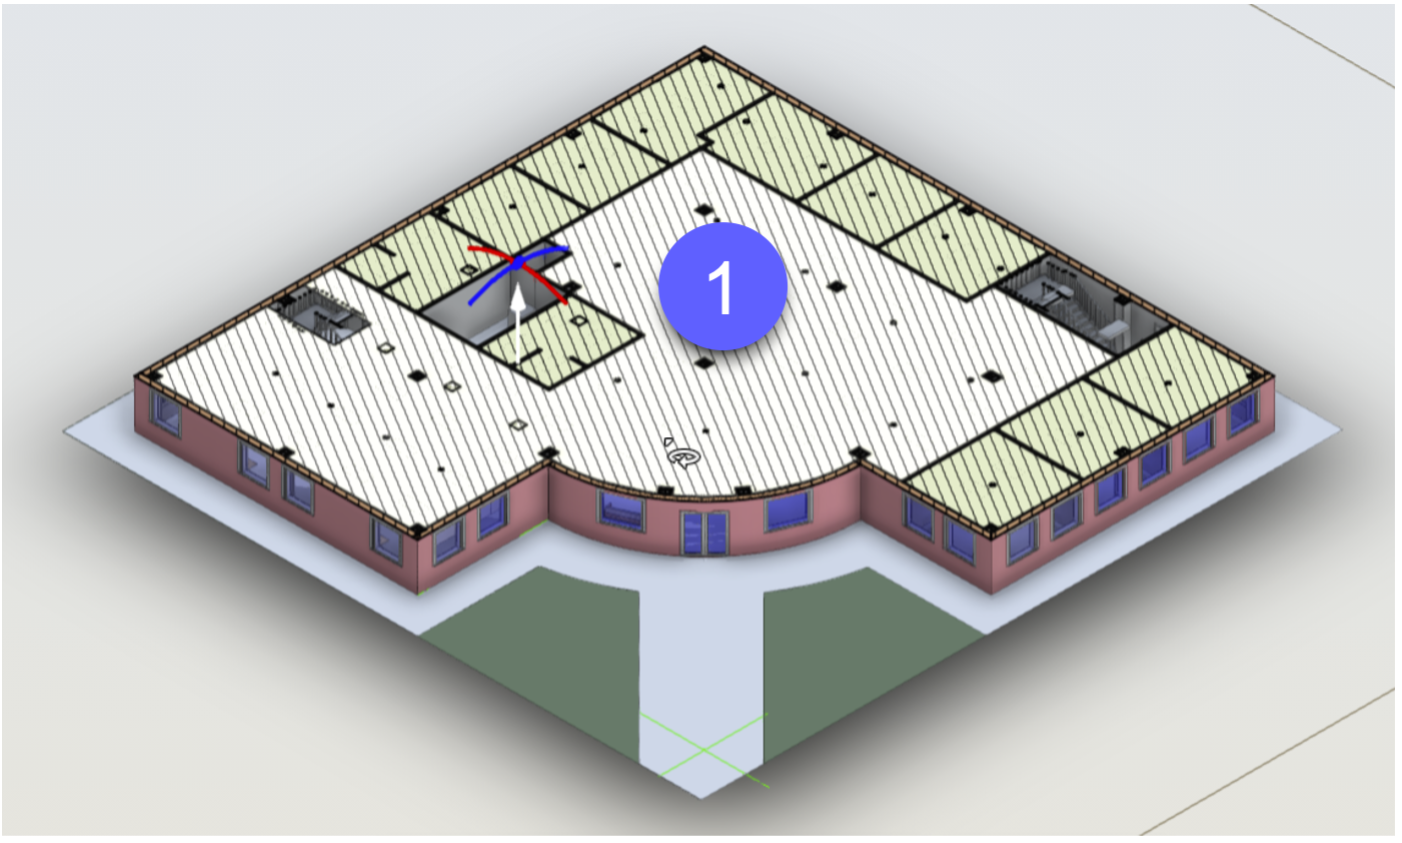
- What is the area now of the 2 x 2 ACT Ceiling system in version 2 on the First Floor in the Open area (Figure 12, mark 1)?
Ceiling system area
- What is the area now of the 2 x 2 ACT Ceiling system in version 2 on the First Floor in the Open area (Figure 12, mark 1)?
_________square feet or
_________square meters
-
- How much larger is it than in version 1 (Figure 12, mark 1)?
Ceiling system area difference
- How much larger is it than in version 1 (Figure 12, mark 1)?
_________square feet or
_________square meters
Hint: After initiating Compare, set the search filter to ceilings to isolate the ceiling category in Model Browser. Then, select the version tile in the Information pane to set the focus. After setting the version, select the ceiling object in the Model Browser, right-click, and select Show Properties. Find the dimensions group of properties and record the value requested. You may need to move the Changes pane to see the Properties pane underneath it. Select the other version tile and repeat the same steps to record and compare values.
-
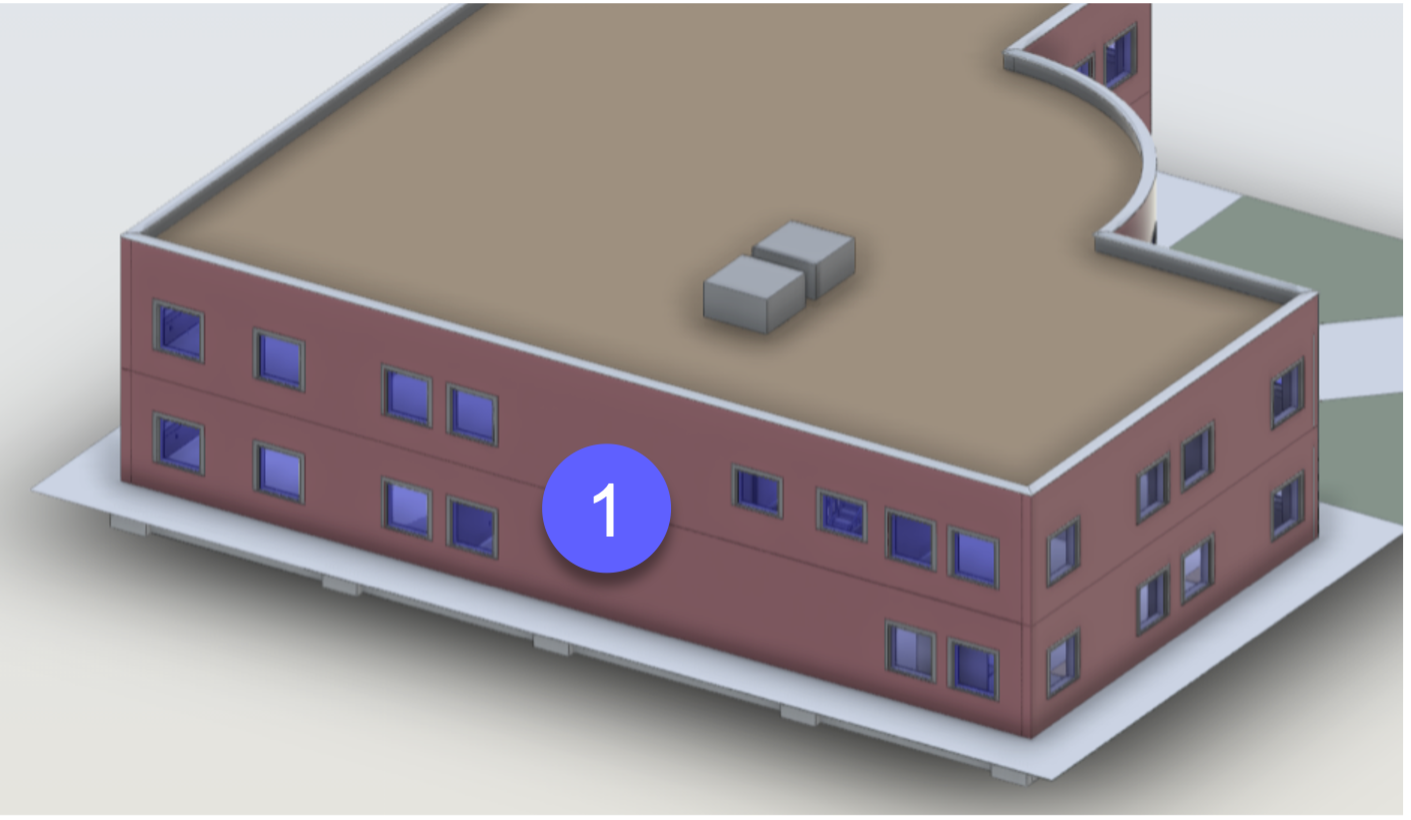
- What is the area now of the Exterior wall in version 2 in the First Floor on the North elevation (Figure 13, mark 1)?
Wall surface area
- What is the area now of the Exterior wall in version 2 in the First Floor on the North elevation (Figure 13, mark 1)?
_________square feet or
_________square meters
-
- How much larger is the surface area than in version 1? (Figure 13, mark 1)
Wall surface area difference
- How much larger is the surface area than in version 1? (Figure 13, mark 1)
_________square feet or
_________square meters
- Close viewer window: Click X in the top-right of the screen to exit the viewer window and return to the Files view.
- Add markups: Explore the model for errors and create at least one markup. Publish the markup.
- Create issues: Explore the model for errors and document them with an issue.
-
- Add your initials as a prefix to the Issue name.
- Assign yourself as the Assignee.
- Suggest how to correct the Issue in the Comment field.
- Publish your issue.
If you are in an instructor-led class, your teacher will respond to your issue. If you are working through the exercises on your own, you can invite a colleague to act as the project manager and respond to your issue.