Build part 3 | Work with Assets
Create a unique asset record for the VAV box component, populate data about the VAV box, and connect other project information to the asset through linked references. You will also use Status Sets to indicate your progress through the exercise.
Autodesk Online Help resources: About Autodesk Build; About Assets
Learning objectives
- Populate asset fields.
- Add references to the VAV box asset.
Exercises
Populate asset inventory
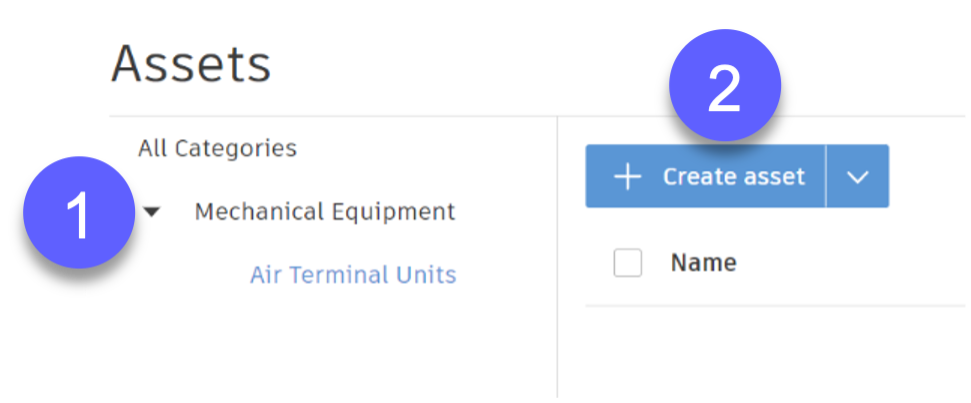
- From Autodesk Build, select Assets in the left navigation menu.

- Click the arrow next to Mechanical Equipment (Figure 28, mark 1) to expand the hierarchy and then select Air Terminal Units. Click Create Asset (Figure 28, mark 2) to add a VAV box instance.
- Populate the fields of the Create Asset form according to the notes below:
- *Name: Last name, first name – Parallel fan powered VAV
- *Category: Air Terminal Units (leave as-is)
- Status: Started (you will be updating the Status field later to indicate progress in the exercise)
- Location: Floor location of your selected VAV box (Hint – the # in the Mark field indicates VAV box level)
- Model: Fill per VAV box properties
- Manufacturer: Fill per VAV box properties
- Mark: Fill per your selected VAV box
- Student name: Last name, first name
*Indicates required field
- Click Create and then click on your newly created Asset in the list. A new pane with tabs will appear on the right side of the screen.
Note: To show additional properties in the Asset list, use the gear icon to add or remove data columns.
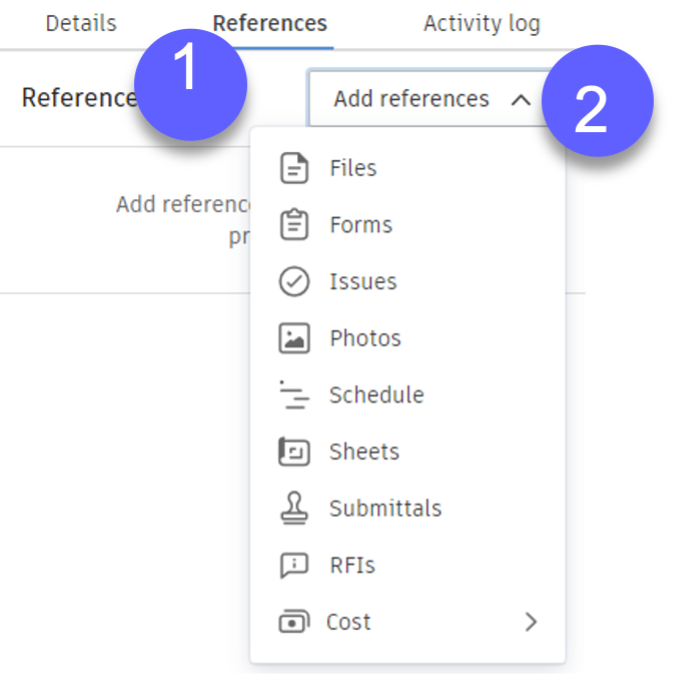
- In the References tab (Figure 29, mark 1), click Add References (Figure 29, mark 2) and add all of the following references to your VAV box asset:
- Files: Add the 23 3600 – AIR TERMINAL UNITS spec document from the _Instructor Handouts folder.
- Sheets: Add the relevant Mechanical Plan (M101 or M102) based upon the location of your chosen VAV box.
- Submittals: Add all three of your Submittal items previously created as part of your Submittal package.
- RFIs: Add the RFI you created previously.
- After adding all of the references listed above, go to the Details tab and change the status of your asset to In Progress. This will ultimately be changed to Completed after the final portion of the exercise is completed.
Note: Remain in the same screen in the Assets inventory as you continue to the next step of the exercise.